
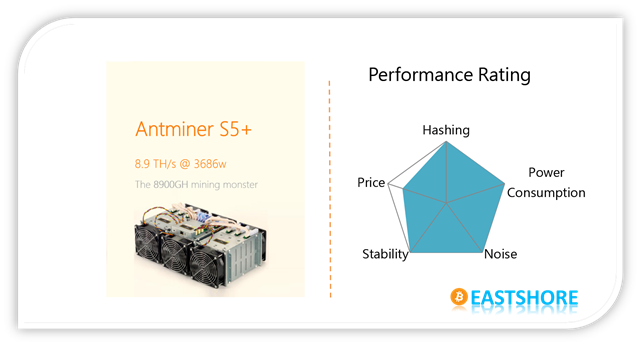
In this tutorial, we will demonstrate the setting-up for Antminer S5+(8.9TH @ 3436w) bitcoin miner.
Miner Specifications
| Brand | Antminer S5+ |
| Hash Rate | 7722GH/s (7.7TH/s) ± 5% |
| Power Consumption | 3436W |
| Chips | 28nm BM1384 |
| Chips count | 432 |
| 6pin ports | 28 (all ports are needed) |
| PSU | NO PSU included |
Preparations
- When you first receive this miner, it is IMPORTANT that you check if any heat sinks have fallen off in shipping. If the device is powered on with fallen off heat sinks, it may bring damages to the hash board.
- If any heat sinks have fallen off, buy a heat sink plaster in local market to fix the heat sink. (The heat sink plaster is usually easy to attain in local market and it should be inexpensive.) The following picture is an example of the heat sink plaster.

- Prepare PSUs (power >= 3500w and with 6pin x 28); You can use several PSUs to connect to 1 miner. But don’t connect 1 PSU to more than 1 miner or more than 1 hashing board.
- Connect the miner to the router with an ethernet cord.
- Use the ethernet cord to connect the miner to the same router which your PC is also connected to. (Your PC is just needed for miner configuration)
PSU Recommended
- You can use five 750w PSU in our store for this miner: here
- Or, you can use three 1600w PSU for this miner. Please note that the PSU requires voltage higher than 205V. The PSU will not start below this voltage: here
Official Guide
- Download the guide: EastShore on Github
Miner Connection & Mining Guide
- First, check if all the cables on the miner are connected properly.
- There are 28 x 6pin ports on the miner. You need to connect all the 6pin ports to your PSU.
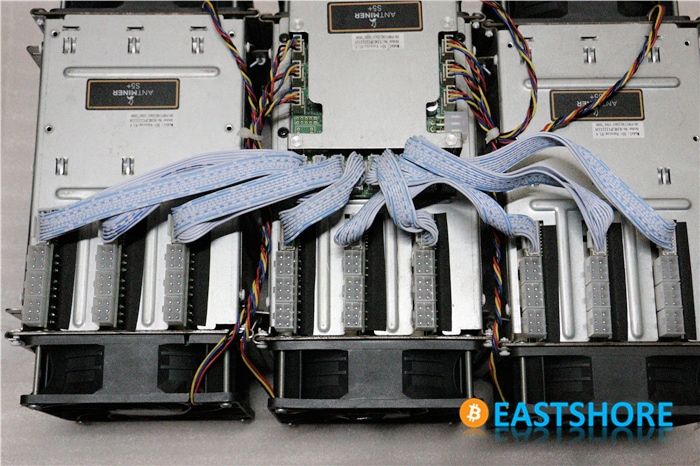
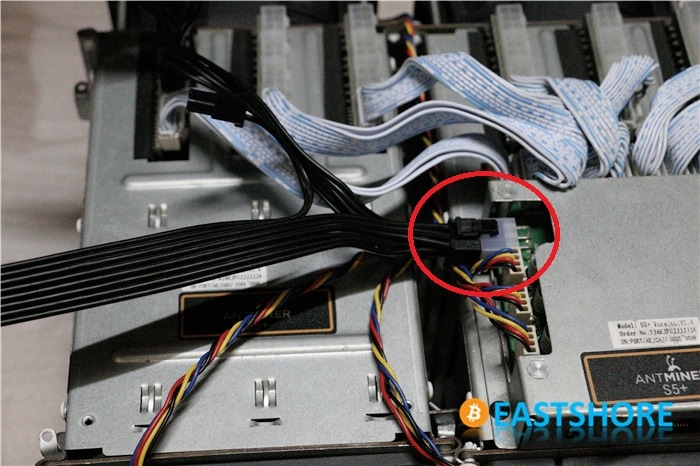
- Connect the 6pin port beside the controller.
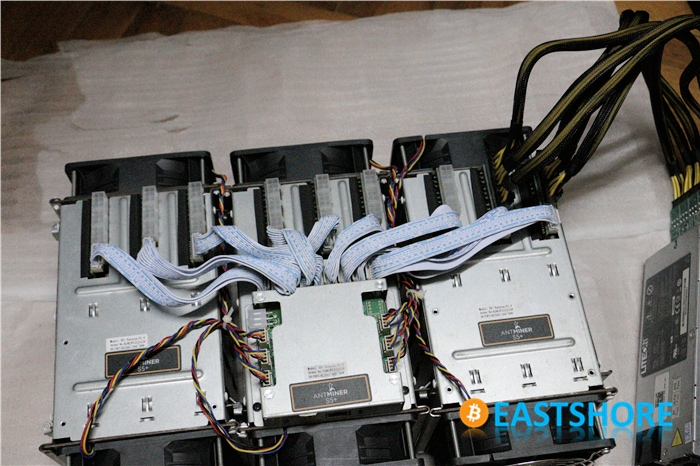
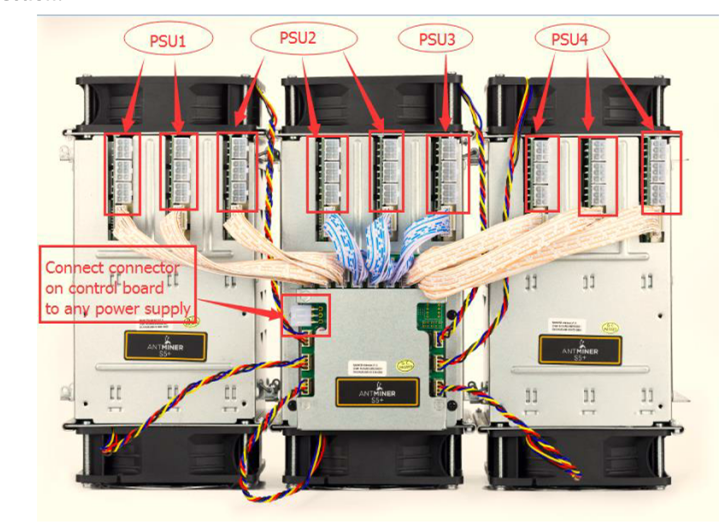
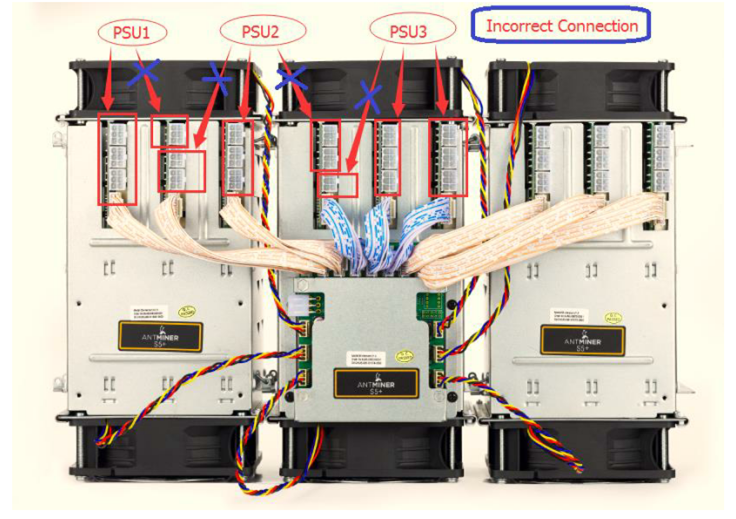
- Important: there are nine hashing boards in the miner, and three 6pin ports on each hashing board. DON’T connect more than one PSU to one hashing board. (That means, the 6pin cords you connected to one hashing board should come from only one PSU.). See below pictures for the correct connection and incorrect connection.
- Correct Connection:
- Incorrect Connection:
- And you can get more power supply connection details in the guide: here
- Insert the ethernet cord.
- Power on the miner. (Important: If you use several PSUs for the miner, you should power on the PSU which is connected to the 6pin port beside the controller finally. In our test, we used a CORSAIR 850w PSU to connect to the port beside the controller (and also the other two ports on the miner). So at first, we power on all the other PSUs, then power on this one.)
- Then, the fan will work loudly. After about 1 minute, the fan will slow down.
- Wait for 1~5 minutes. The fan will work loudly again. (In our test, the Antminer S5+ needs more time than Antminer S5 to connect itself to the network.)
- Then, use software to scan the IP of the miner. For how to scan the IP of the miner, check here: here
- Then you can log in the miner with the IP you just scanned and configure the mining account. (The username and the password are all “root”)
- In the “Miner Configuration“, configure your mining pool address, mining account, miner password etc. And click “Save & Apply”.
- Save the changes, wait for about 1~5 minutes, the miner will start mining automatically.
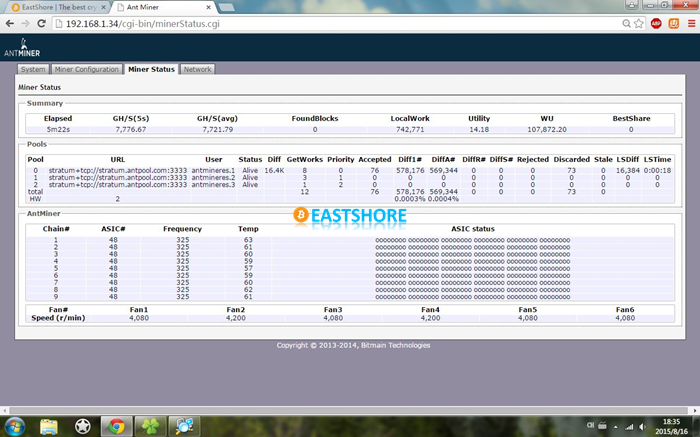
- In the “Miner Status“, you can see the monitor the miner.
- If the miner doesn’t start mining (the “Speed” on the miner status page shows 0), reset the miner by clicking “System” –> “Upgrade” –> “reset”
- If you have any further problems, please contact us: https://www.eastshoremining.com/contact/