In this tutorial, we will demonstrate the setting-up for Antminer S5(1.15TH @ 590w) bitcoin miner.
Miner Specifications
| Brand | Antminer S5 |
| Hash Rate | 1150GH/s (1.15TH/s) ± 5% |
| Power Consumption | 590w |
| Chips | 28nm BM1384 |
| PSU | NO PSU. NEED a PSU >= 750w with 6pin x 2 (12V DC >= 60A) |
Official Manual
You can also get the manual here (for network setting, firmware upgrade etc.): Eastshore Support Page on Github
Preparations
- Get a ATX PSU ( >=750w and with 6pin x 4). Please make sure your PSU is powerful enough. The higher ampere with the 12V DC, the better is your PSU.
- Connect the miner to the router with an ethernet cord.
- Use the ethernet cord to connect the miner to the same router which your PC is also connected. (Your PC is just needed for miner configuration.)
PSU Requirements
- Prepare a ATX PSU ( >=750w; with 6pin x 2)
- Make sure your PSU is powerful enough; 12V DC is above 60A is a good option!
Setting up the PSU: ATX PSU
If you bought the mining PSU in EastShore, please skip this section and follow the next section {Setting up PSU: LITEON 750w PSU}.
- Suppose you use a ATX Computer Power Supply as your mining PSU.
- You will need 1 jumper wire. On the PSU’s 24pin motherboard power cable, you have to cross the “Green” line and the “Black” line. (The PSU has a computer inside and it communicates with the motherboard. For this setting, there is no computer motherboard to connect to, so, we have to make the PSU “think” it’s connected to the motherboard and the PCI and PCI-Express ports need the +12 V power.

Setting up the PSU: LITEON 750w PSU
If you bought our LITEON 750w PSU, you need to connect it before using it. Here are the steps:
- This is the product.

- There is a connection board in the package.

- Connect the connection board to the PSU.

- Then connect the 6pin cords. (You need 4 x 6pin to connect the miner. )
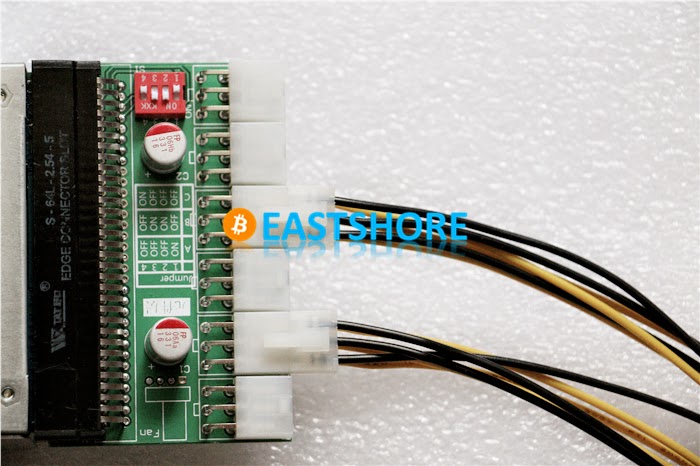
- Connect the power cord.
- All connection done.
Miner Connection
- There are four 6pin connector in 2 rows. You’d better connect all the 4 connectors via 6pin cords.
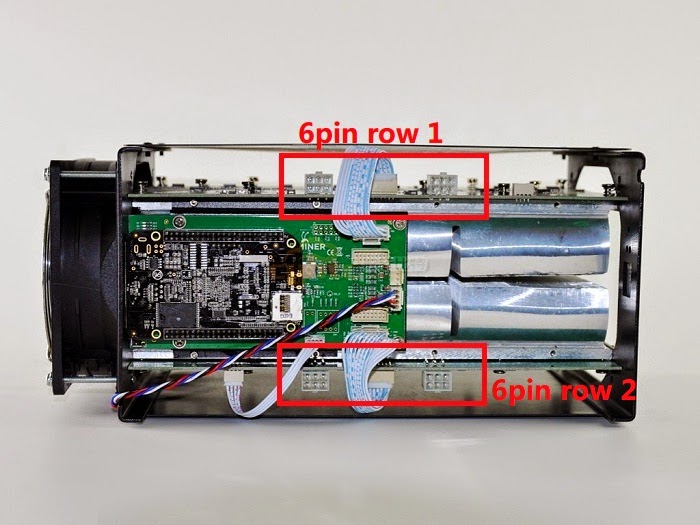
- After all the 4pin connected, it should look like this:

MINING GUIDE
- Scan the IP address of the miner, see here for how to do this: https://www.eastshoremining.com/how-to-scan-out-the-configuration-ip-address-of-the-miner/
- Connect all the cords and ethernet cord.
- Power on the PSU.
- Wait for about 1~3 minutes (the miner needs time to connect itself to the router).
- Scan the IP of the miner. (For how to scan, see the section {configuration IP} above)
- Now, we can configure the miner now.
- Log in the configuration page via the configuration IP you scanned (eg. 192.168.1.16). The default username is “root” and password is “root” too, and then click “Log in”.
- If you can’t log in the miner via the IP, or you didn’t scan the IP, reset the miner first: https://www.eastshoremining.com/how-to-reset-antminer-s5/
- In the “Miner Configuration”, configure your mining pool address, mining account, miner password etc. Click “Save & Apply”.
- Wait for 1~2 minutes.(ps: while you are waiting, you’d better not to click anything)
- Then mining gets starting… You can check the mining status in the “Miner Status” page. (ps: sometimes, the page may show no data, it occurs sometimes however. In that situation, just power off your miner, and power on it again.)
- Sometimes, when the mining starts, the “ASIC Status” may be shown as “——” or the speed may be low, don’t worry, just let the miner work about 5 minutes and the “—–” will be disappear and the speed will be normal. (Also, you can try to restart the miner if the “—–” persists.)
- The mining will start automatically after you configure it.
- If the network settings work well for you, there is no need to change anything.
Troubleshooting: Miner does’nt start mining
Trying the following:
- check if all the cords on the miner are inserted tightly. (We pack the products very carefully, but there is risk cords on the miner might loosen up during the shipping. )
- power off the miner and wait for some seconds, and power it on again.
- reset the miner via the reset hole: check here for how to reset:https://www.eastshoremining.com/how-to-reset-antminer-s5/

- upgrade the firmware. (see the Manual for how to upgrade the firmware)
- run one blade only to see if there are some problems with one of the blade. Steps: 1. Power off the miner; 2. plug out the signal cable (as indicated in the following picture) of one miner. 3. Power on the miner again to see if the blade works with only one blade. Run each blade at a time to see which blade is not working.

- take out the screws on the controller (the little green board with the black pi on the top of the miner), and lift the controller up, see if the miner works normally. If it does, then it suggests that the needle below the controller is too long so it touches the metal holder and affects the signal transmission of the controller.
- rewrite the image for the miner, follow instructions here: http://eastshoretrade.blogspot.com/2015/04/tutorial-setting-uphow-to-re-image.html
- if you have more than one miner, try replacing the controller of the un-mining miner. For how to replace, please see the section {Replace the Controller} below.
- if all the methods above do not work, and if you have more than one miners, try to diagnose which part of the miner is problematic, follow instructions as: replace the controller, the fan and the 2 blades of the bad miner with the part from the good miner respectively, to identify which part of the miner is causing problems (if replacing works out the problem, then this replaced part is the source of the problem).
Replacing the Controller
The section is only for those who want to replace the controller on the miner. You can skip this section if you don’t need to do such.
- This is the controller of the S5.
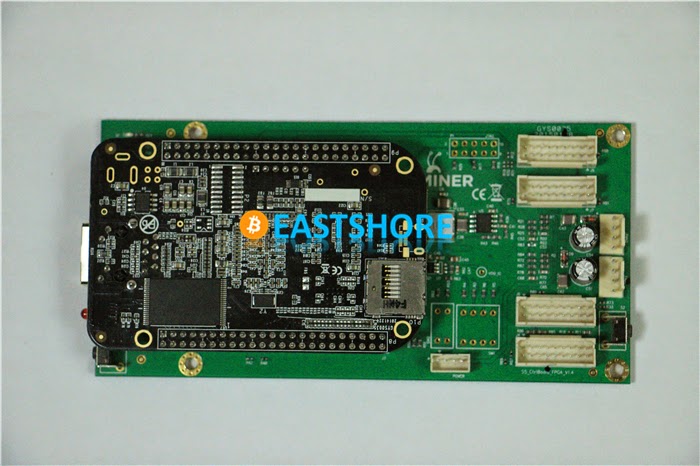
- First, disable the control by taking out all the cables (including the ethernet cord) of the miner you are diagnosing.
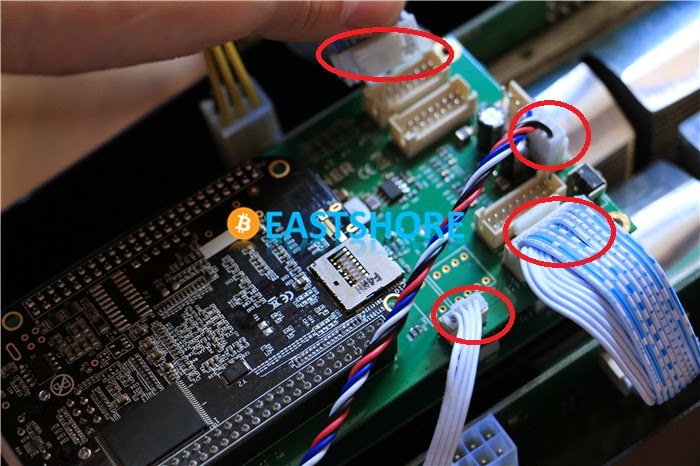
- Get a new controller.
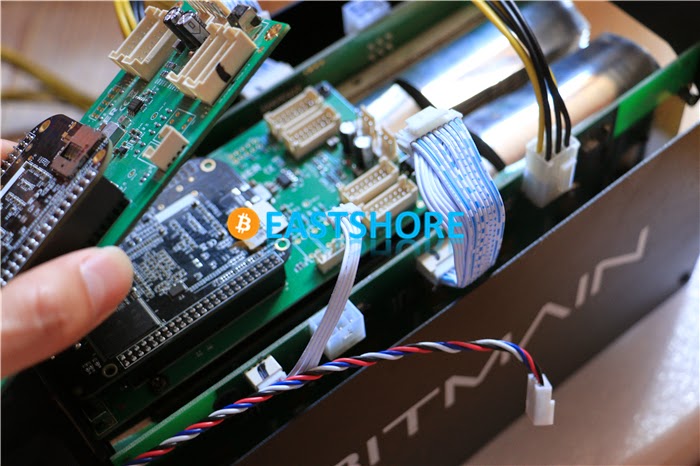
- Connect the cables to the new controller.
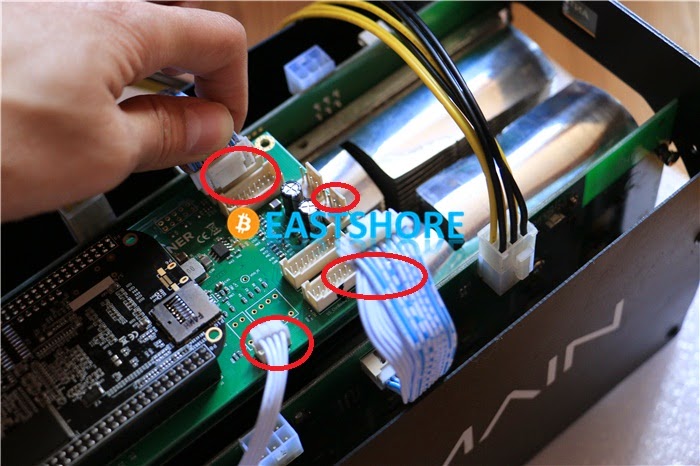
- Make sure all the cables are inserted tightly (as indicated in the picture below).
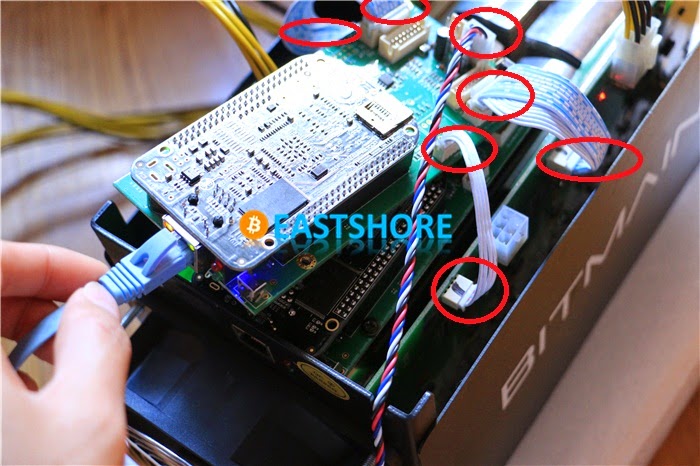
- Insert the ethernet cord.
- Replacing done.
Troubleshooting
Trouble 1: no data show on the “Miner Status” page, try:
- Check if your home network setting is normal.
- Check if your home network connects to the mining pool address you set in the “Miner Configuration”
- Set the network protocol to DHCP via Network -> Setting.
- Upgrade the firmware. According to our experience, the trouble happens with some old version of mining system.
- Check if all the cables inside the miner are connected properly.
- Make sure you click “Save&Apply” after change settings. While you wait for the setting to apply, don’t click anyting.
- Reset the miner: https://www.eastshoremining.com/how-to-reset-antminer-s5/
Trouble 2: you are getting “x” (or “-“) on the ASIC chip status and the mining speed is low, try:
- Power off the miner, wait for a few minutes, then power on it again. Check the chip status to see if the “x” (or the “-“) disappears.
- Check if all the cables inside the miner are inserted properly.
- Check the heat and check if the temperature is too high. Incease air flow or create cooler environment. If you have several miners runnning, space them out.
- Turn off the miner and check if your PSU cables are connected properly. Then restart.

