
This tutorial is intended for the Antminer G2 Ethereum Miner of AMD RX570 GPU Miner. This Antminer G2 Ethereum GPU Miner is recently developed by Bitmain, it supports multi-currency mining including ETH, Zcash, XMR and so on. It hits a speed of 220MHash ±10% for ETH mining with EIGHT AMD Radeon RX570 video cards which makes it undoubtedly a pioneer machine in the field.
Miner Specifications
| Brand | Antminer G2 |
| Hash Rate | 220MHash ±10% (198MH/s ~ 240MH/s) for ETH mining |
| Operating System | CentOS 7.0 (Linux) |
| Pre-installed mining software | claymore 9.7 |
| Network Connection | Ethernet |
| PSU | with PSU |
Preparations
The following background knowledge would be helpful to use the miner:
- Knowledge regarding GPU and the GPU miners.
- Knowledge regarding how to mine with a PC and how to mine with a video card.
- Knowledge regarding CentOS 7.0 or Linux operating system.
- Knowledge regarding ETH/ETC/ZEC or any others cryptocurrencies coins you are interested.
- Knowledge regarding cryptocurrency such as wallet address, mining pools etc.
Miner Connection
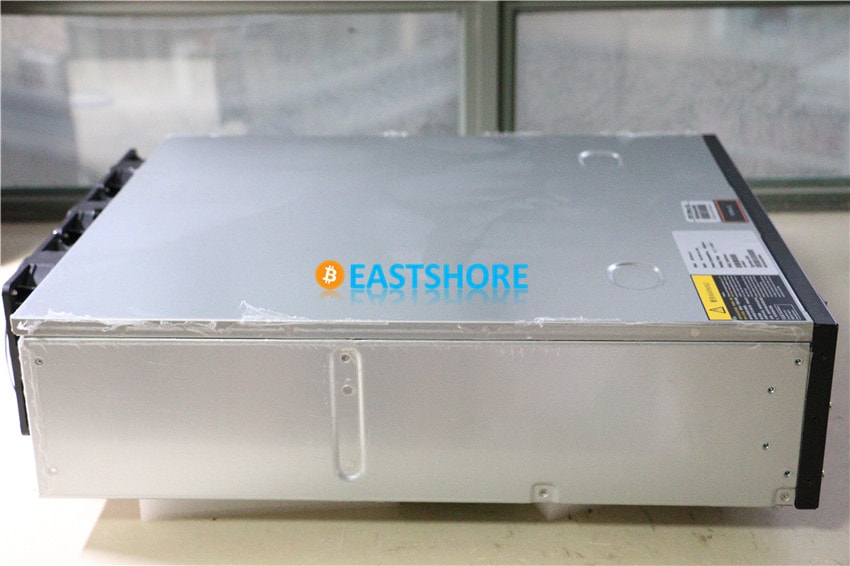
- This is the miner you will receive from EastShore.
- A monitor is required (and a keyboard, a mouse) for configuration. (only needed when you configure the miner).
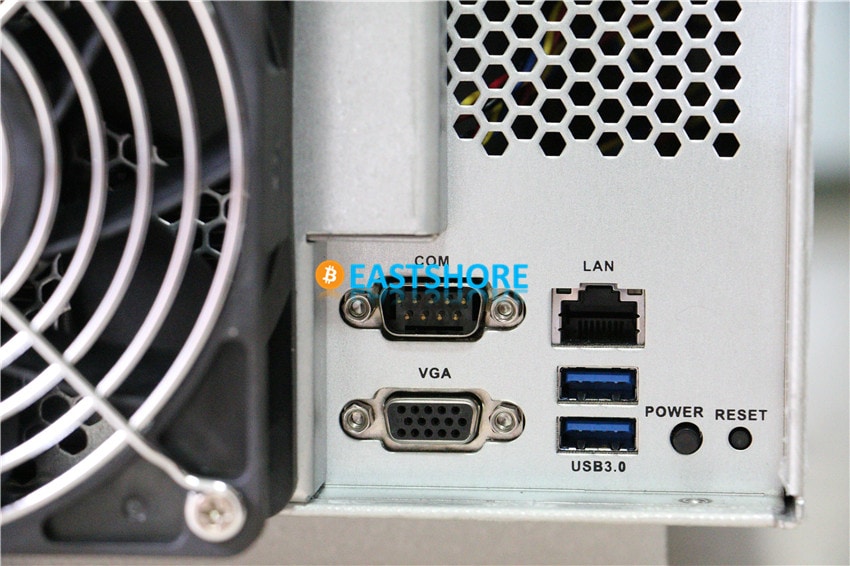
- All the ports needed are on one side of the miner. Those ports are:
- VGA port: for the monitor connection (HDMI is not supported)
- USB port x 2: for the keyboard and mouse connection
- Ethernet port
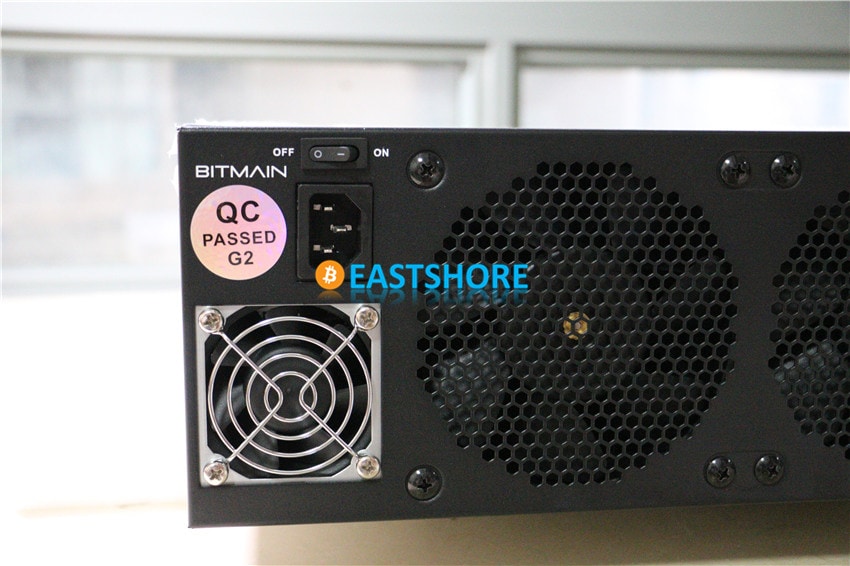
- Connect your monitor, keyboard, the mouse and the Ethernet cord to the miner.

- Connect the power cable of the PSU.
- Tah-dah, connection done.
Start Mining in ONE Minutes
- Power on the miner.
- Wait for 3 ~ 5 minutes, then the operating system will start.
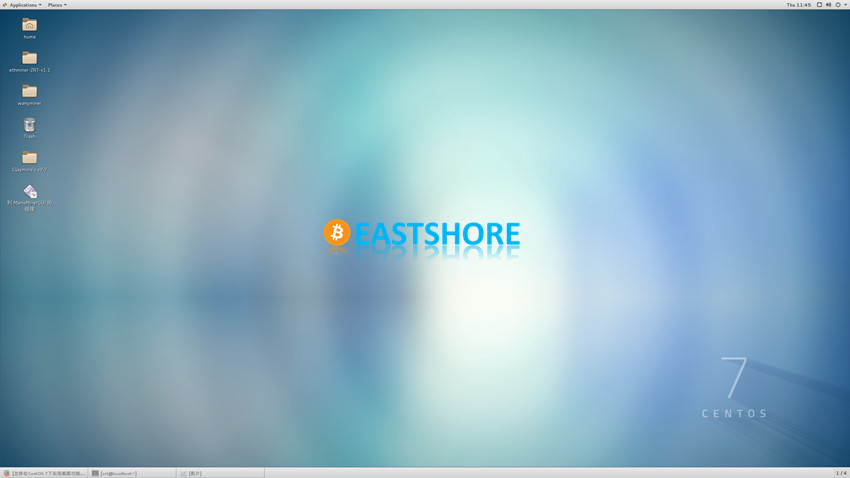
- The mining system of the miner is the “CentOS 7.0” operating system. Generally, the operating system will start automatically, and the Desktop will show.
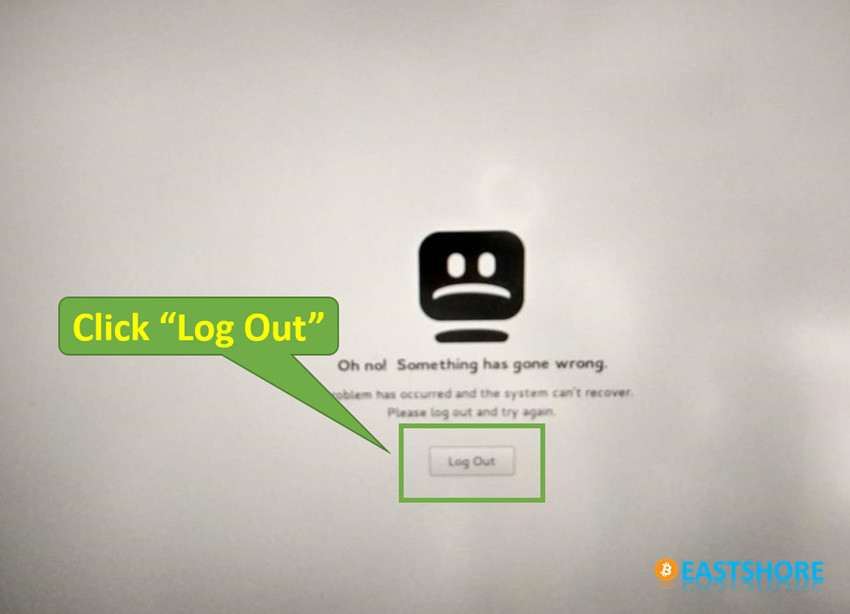
- However, in some case, there may be an error occurred during the system starting. Don’t worry, just clicking the “Log Out” in the following picture.
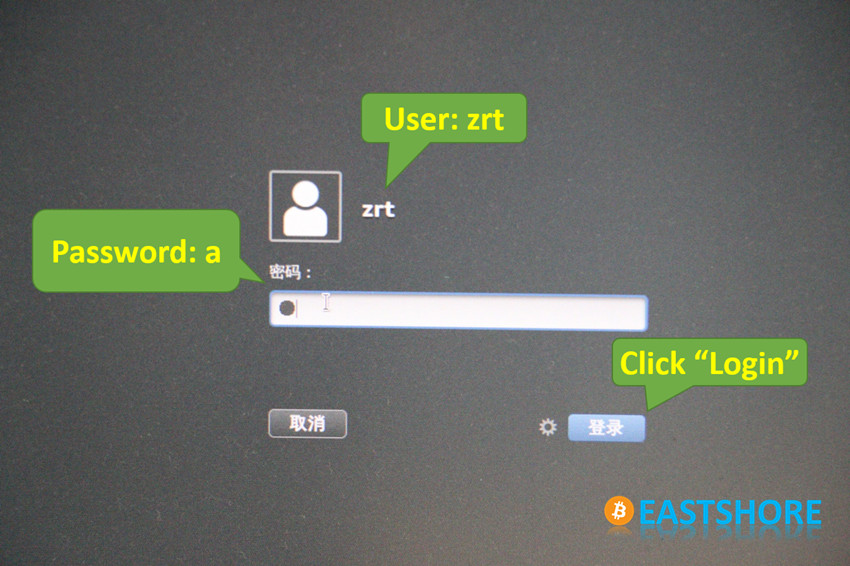
- Then click the user “zrt” and input the password “a” to log in.
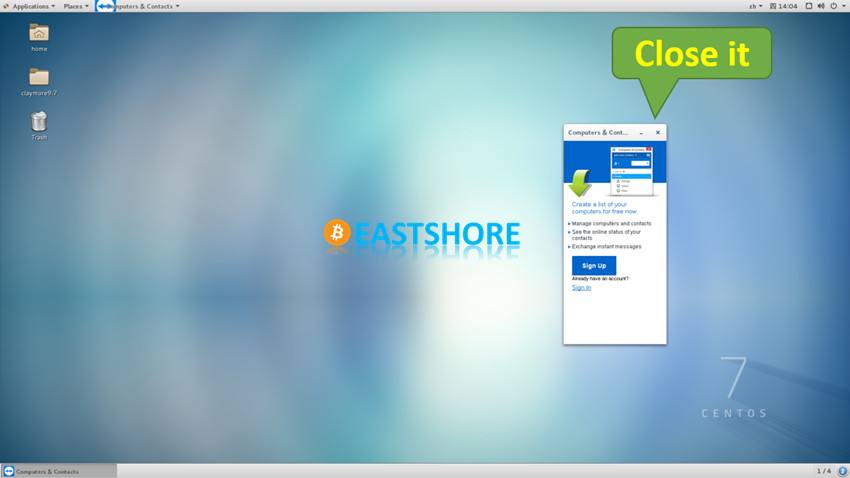
- If there is a pop-up window titled as “Computers & Contacts” appear after the operating system starts, just close it.
- We will take ETH mining setting as an example in the following tutorial.
- Setting up your own mining account:
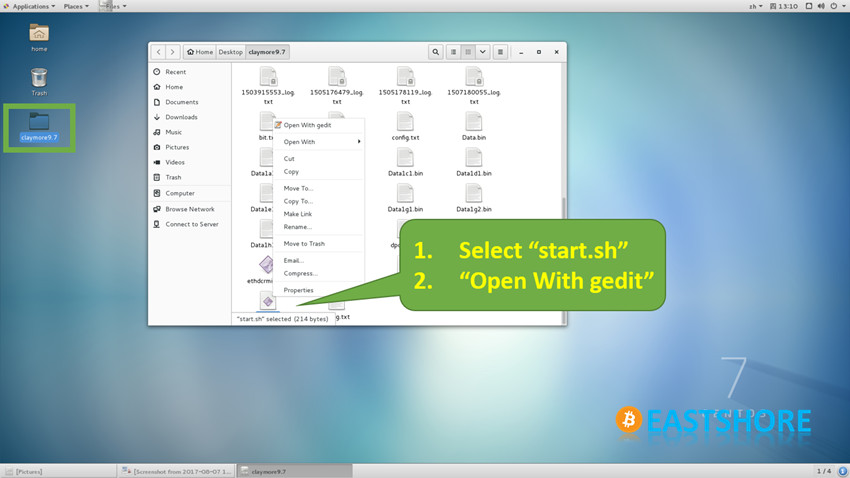
- Open folder “claymore9.7” on the Desktop
- Right-click on the file “start.sh“
- Run “Open With gedit“
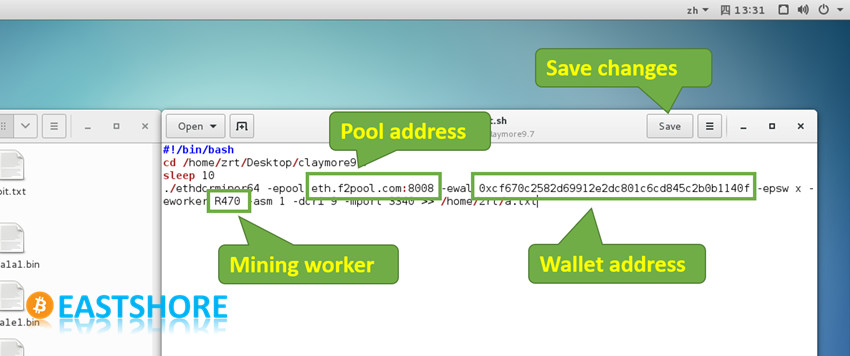
- The following command is the ETH mining command

- Set your own mining pool, wallet address and mining worker, then save the changes.
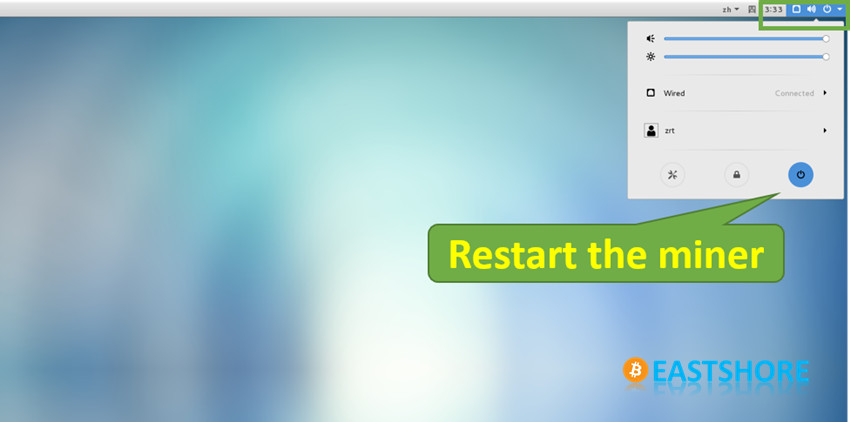
- Close the file, and restart the miner (otherwise the mining settings will not be applied).
- The pre-installed mining software “claymore9.7” will start automatically after 1 minute the operating system restarted.
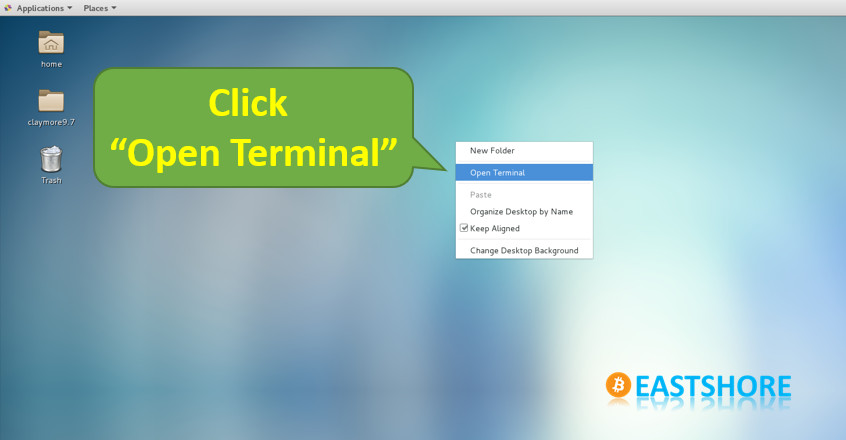
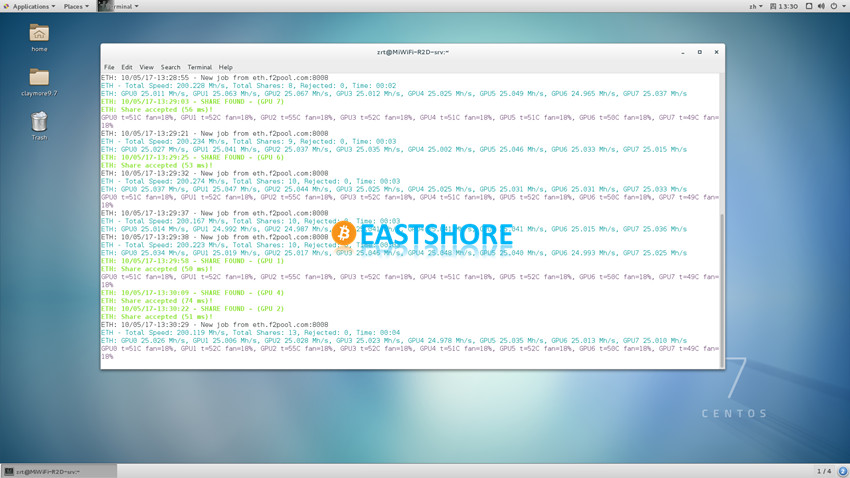
- However, the “claymore” works as a background program, so the GUI window will not appear. To get the mining details shown, we need to:
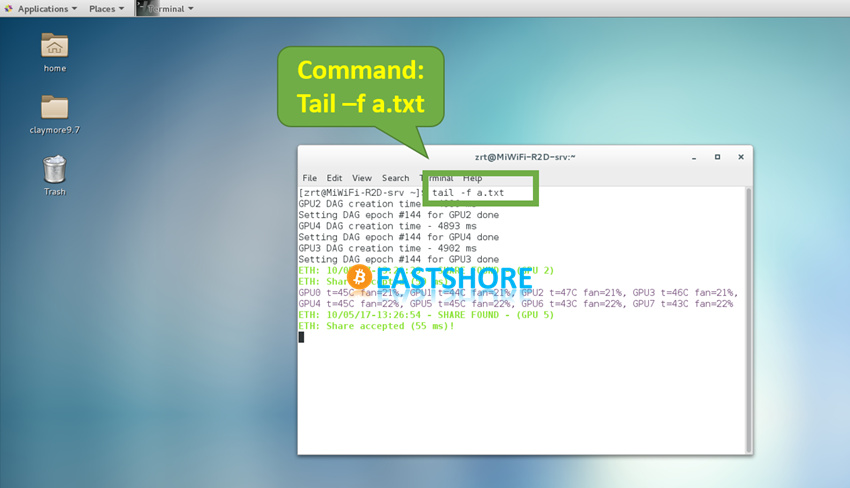
- Open a terminal window on the Desktop
- Input command: tail -f a.txt
- Then the mining details will be shown
- You can also use other mining software(should be Linux version) for the mining.
Troubleshoot
Q: The hashing speed is lower than usual(eg. 100MH/s for ETH). / There are only 7 (or less) GPU works, not all the eight.
A:
- First, please make sure if all the video cards are working.
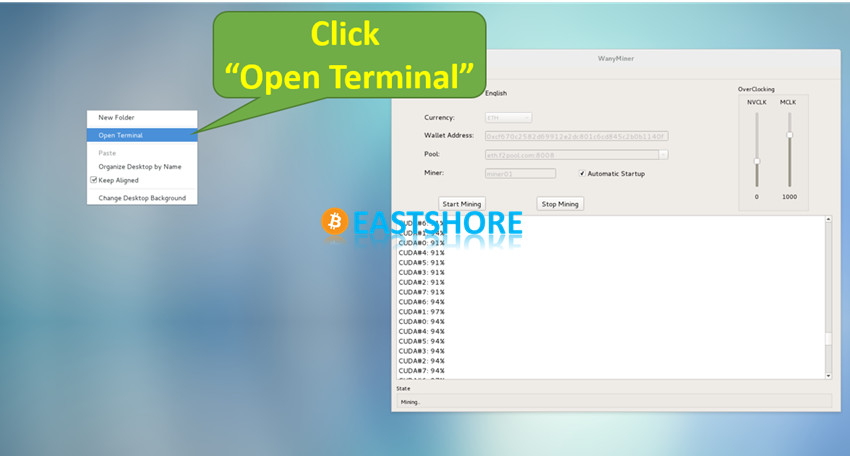
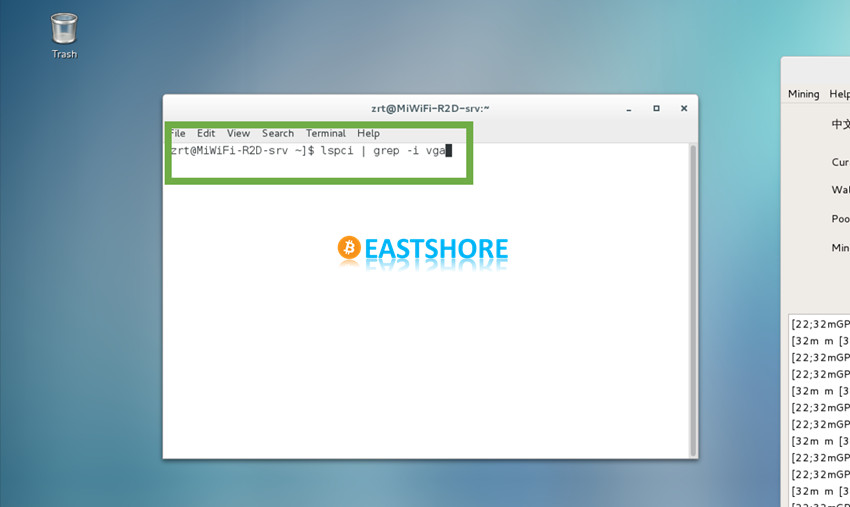
- Right-click on the desktop, click “Open Terminal” on the pop-up menu.
- In the pop-up windows, input command “lspci | grep -i vga“
- There should be EIGHT AMD video cards details shown in the windows (it will be showing as “RX 470/480 Series”)
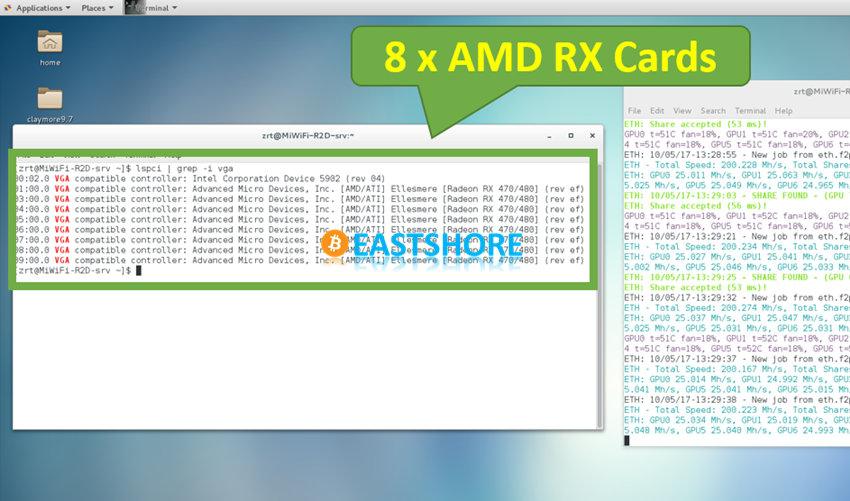
- If there are not EIGHT AMD video cards shown, then maybe some video cards in the case loosened up during shipping.
- In that case, power off the miner first, open the case of the miner to insert those video cards properly and tightly.
- There is a screw on the case of the miner.
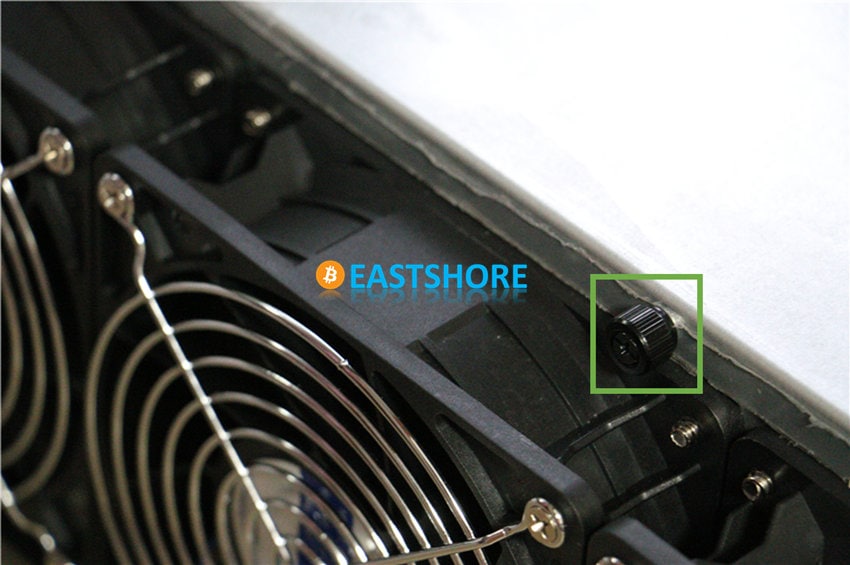
- Take the screws out, and slide out the case.
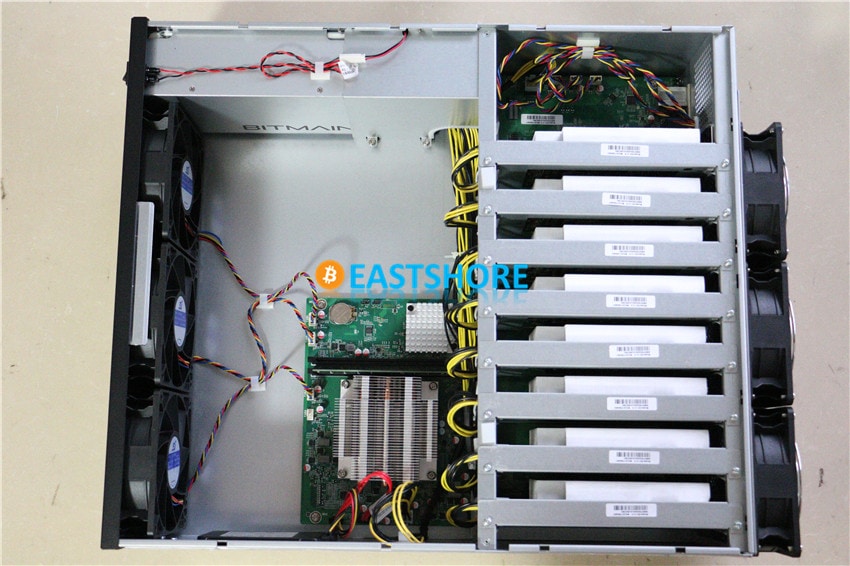
- There are eight video cards in the miner. Please make sure all the cards and cables are inserted tightly.
- Power on the miner again to check if all the video cards appear. The problem would be solved.
Pingback: Evaluation on BITMAIN’s GPU Miner Antminer G2 | EastShore Mining Devices